You’ve pampered those seedlings for weeks. But one transplanting error can ruin everything. Wilted leaves. Stunted growth. Dead plants. Most failures result from simple mistakes: planting too deep, wrong timing, rough handling. Poor soil or root shock makes it worse.
The good news is that you can dodge these traps. Here are 15 critical mistakes when transplanting tomatoes and how to fix them; no bluff, just smarter growing. Save your crop. Let’s go.
15 Critical Mistakes When Transplanting Tomatoes (Every Gardener Must Avoid)
1. Ignoring the “Root Ball Squeeze”

Most gardening guides urge on handling roots with extreme care, but research suggests that a little controlled pressure can help. When tomato seedlings stay in pots too long, roots circle tightly, leading to girdling later.
A 2018 study in the Journal of the American Society for Horticultural Science found that lightly squeezing the root ball before transplanting encouraged outward root growth by up to 30% compared to untouched plants.
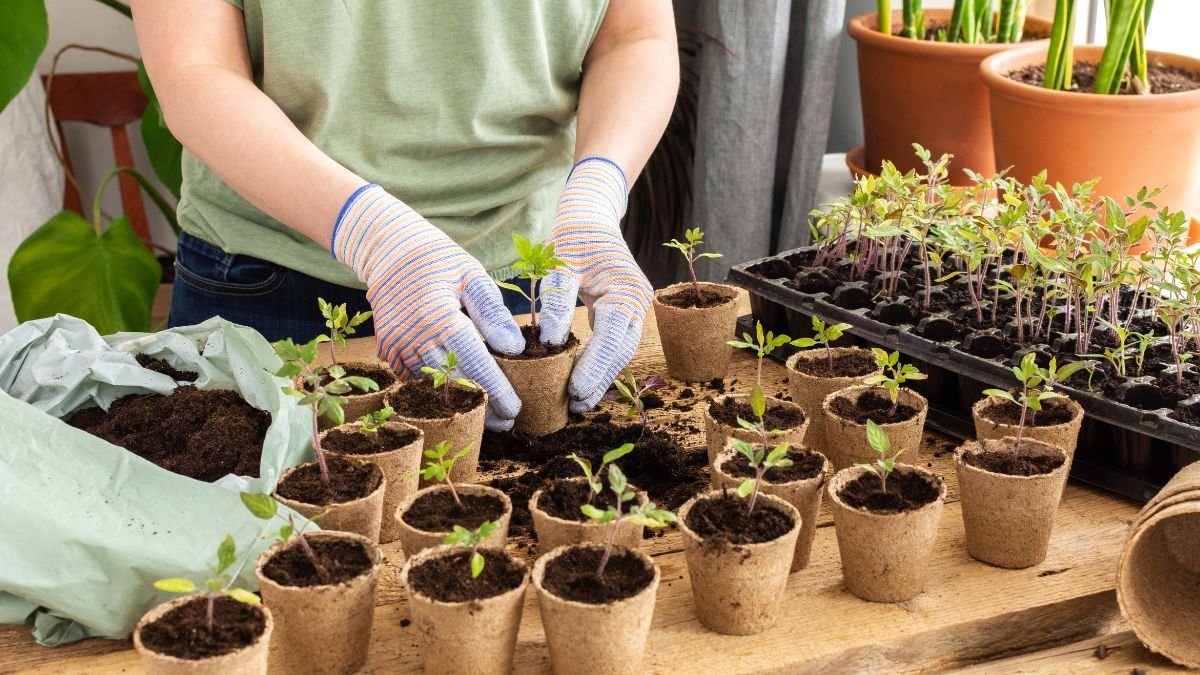
Instead of just teasing roots apart, gently compress the sides of the root mass between your thumb and forefinger. This breaks up spiral patterns without tearing fine roots. The goal isn’t to thrash; just enough pressure to loosen the structure. Plants treated this way grow faster because roots spread horizontally rather than staying cramped.
One grower tested this on two batches of ‘Brandywine’ tomatoes. The squeezed group outpaced the untouched plants by two weeks in fruit production. If roots resist slightly, that’s normal. Think of it like ruffling a dog’s fur to check for ticks: firm but not rough.
2. The Midnight Transplant Trap
Traditional wisdom says to transplant at dawn to reduce stress. Yet soil temperature matters more than avoiding sunlight. Tomatoes planted at 10 AM–2 PM often recover quickly because warmer soil (above 60°F) stimulates root activity. Cool dawn soil slows their ability to uptake water, leaving them vulnerable to midday heat.
A commercial grower in Arizona followed transplant times across 500 plants. Those moved at 11 AM showed less wilting by evening compared to the 5 AM group. Warm roots absorb moisture efficiently, while chilly early-morning soil leaves plants playing catch-up.
If you must plant early, pre-warm the soil with black plastic for a few days. Or wait until mid-morning when the sun has kissed the ground. Either way, avoid late afternoon as cooling evening temps can stall growth overnight.
3. Over-Reliance on Mycorrhizae

Mycorrhizal fungi get honored as root boosters but are not always useful. Added fungi compete with roots for resources in soils already rich in phosphorus.
A 2020 HortTechnology study showed that inoculated tomatoes in high-P soil grew 15% slower than non-treated plants.
Test your soil first. If phosphorus levels exceed 40 ppm, skip mycorrhizae. Another clue is that fast-growing weeds like lamb’s quarters predict abundant phosphorus. In these cases, fungi become freeloaders rather than partners.
One gardener in Oregon learned this after years of stunted transplants. A soil test revealed excessive phosphorus from years of compost use. Once she stopped adding mycorrhizae, the plants rebounded within weeks.
4. The “Deep Planting” Lie
Burying tomato stems promotes extra roots, except when it doesn’t. Dwarf varieties and some heirlooms (like ‘Stupice’) resent deep planting. Their stems rot easily if buried, unlike vigorous hybrids.
A trial at Utah State University compared planting depths for 12 varieties. While ‘Big Beef’ thrived with 6-inch-deep stems, ‘Black Cherry’ suffered 20% losses from stem rot. The difference? Woodier stems on dwarfs resist rooting but absorb moisture like sponges.
Try to inspect the stem before planting. If it’s thin and green, bury it. If it’s tough and fibrous, keep it at soil level. When in doubt, lay the plant sideways in a shallow trench; roots will still form along the stem without drowning the crown.
5. Watering Right After Transplanting

Everyone says to water transplants instantly, but waiting pays off. Dry soil forces roots to seek moisture, strengthening them faster. According to a Cornell Vegetable Program report, a 12-hour delay can reduce transplant shock by up to 40%.
Freshly watered soil consolidates around roots, limiting oxygen. Letting plants settle first encourages deeper root expansion. One farmer in New York waters transplants lightly, then waits until the next morning for a full soak. His plants showed less wilting and higher survival rates.
Plant in slightly damp soil, then water only if leaves droop. Otherwise, hold off until the next day. Roots will grow toward residual moisture, creating a sturdier foundation.
6. Using Eggshells Wrong

Eggshells are a popular garden amendment, but how you prepare them matters. Crushed shells take years to decompose, offering little direct benefit. Finely powdered eggshells increase calcium availability in soil within weeks, while granulated pieces show minimal breakdown even after six months.
For faster results, grind dried shells into a fine powder using a blender or mortar and pestle. This increases surface area, speeding up nutrient release. Sprinkle the powder near tomato plants to prevent blossom end rot or mix it into planting holes for strong root development.
Don’t throw large shell pieces directly into beds. They’ll sit there, barely decomposing, and may even attract pests. Powdered shells blend seamlessly into soil, delivering calcium without the wait.
7. The Mulch Mistake

Mulch helps contain moisture, but placing it too close to stems invites trouble. Straw, especially, holds dampness against tender plant bases, creating a breeding ground for fungal diseases like stem rot.
Keep straw 2–3 inches away from seedlings and mature plants. This gap allows airflow while still protecting roots. For delicate transplants, use a lighter mulch like pine needles until the stems toughen.
Wet conditions deepen the problem. In humid climates, go for coarse materials like wood chips that resist compaction. Proper spacing prevents disease without sacrificing mulch benefits.
8. Pre-Planting Fertilizer Burn
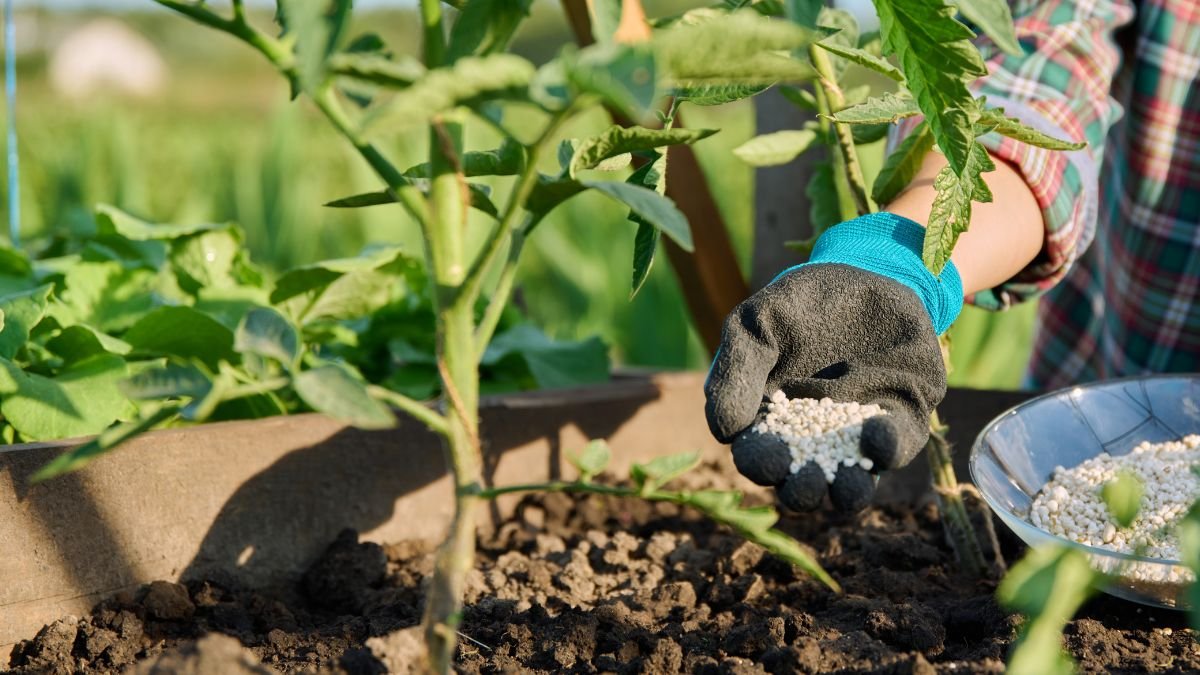
Even gentle fertilizers like compost can harm young plants if applied too early. Fresh transplants need time to adjust before facing nutrient-rich soil.
A Penn State study found that seedlings exposed to high-nutrient mixes right after planting showed stunted growth compared to those given a two-week adjustment period.
Wait for 10–14 days after transplanting before adding fertilizer. Let roots establish first. If using compost, lightly mix it into the topsoil instead of burying it near roots. Overeager feeding causes leaf burn and root stress. Patience pays off. Healthy plants absorb nutrients better once settled.
9. Ignoring Wind Training

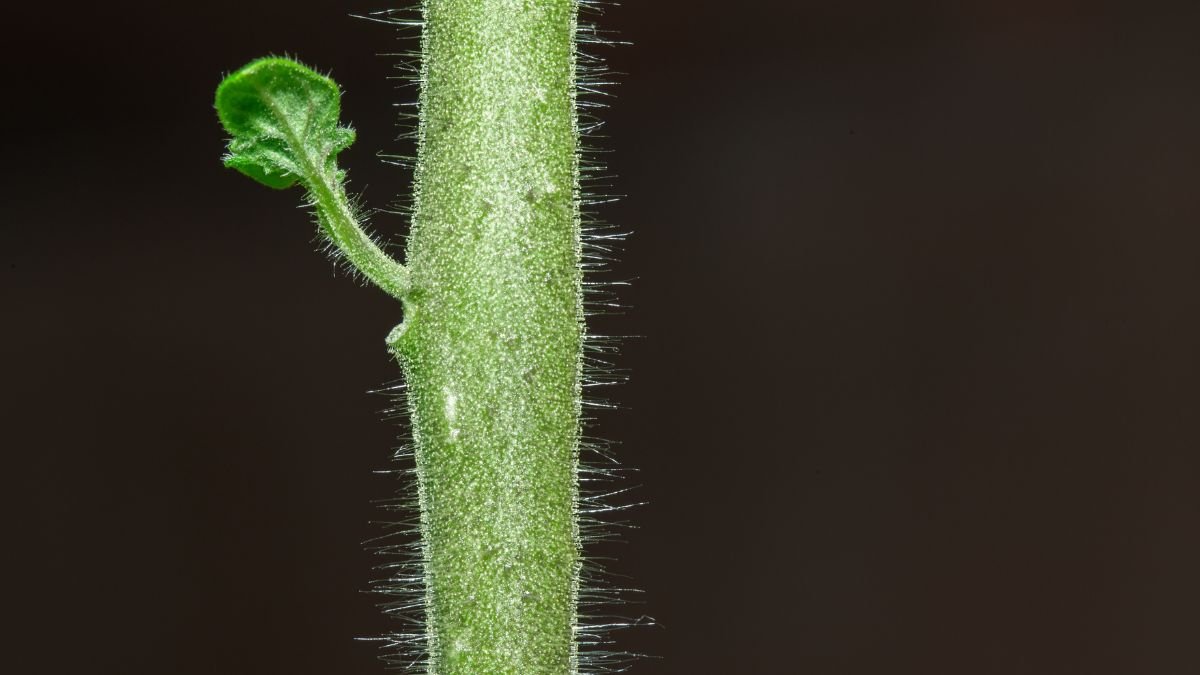
Sheltered seedlings grow weak stems. Gentle wind strengthens plants by promoting micro-tears that thicken cell walls. Seedlings exposed to light breezes develop sturdier stems than those grown in still air, reducing transplant shock by 25%.
Use a fan on a low setting for indoor starts or brush your hand over seedlings daily. Outdoors, avoid windbreaks for hardy crops like tomatoes. Controlled stress builds resilience.
10. The Wrong Shade of Cloth Color

Shade cloth color affects light diffusion, not just blockage. Black fabric absorbs more heat, raising temperatures underneath. Green shade cloth allows better light penetration for recovery while reducing heat stress.
For stressed plants, choose green or aluminum over black. Lighter colors disperse light evenly, promoting photosynthesis without overheating. Match shade percentage to crop needs: 30% for greens, 50% for delicate herbs.
11. Over-Trimming Cotyledons

Those first rounded leaves that appear from a seedling aren’t just placeholders, they’re the plant’s lifeline. Cotyledons contain stored nutrients that fuel early growth until true leaves develop and photosynthesis kicks in. When gardeners trim them off too soon to “clean up” seedlings, they’re essentially cutting off the plant’s food supply.
The consequences show up quickly. Seedlings with trimmed cotyledons often develop weak, lean stems as they struggle to compensate for lost energy. Their root systems remain underdeveloped since there are not enough resources to grow both roots and shoots properly. This early setback can remain throughout the entire growing season, resulting in smaller plants and reduced flowering.
For plants like beans, squash, and sunflowers, the cotyledons rise above ground and contribute to photosynthesis. These should never be removed. Even for plants where cotyledons stay below soil, like peas, they’re still providing vital nutrition. The best approach is to leave them alone until they naturally yellow and shrivel which is a sign the plant no longer needs them.
12. Transplanting into “Wet” Soil

The difference between moist and soggy soil can make or break your transplants. While it’s tempting to plant into freshly watered ground, overly wet conditions create an oxygen-starved environment that roots can’t tolerate. The damage often isn’t immediately visible, but plants will fail to thrive as their root systems suffocate.
A simple hand test reveals the ideal moisture level. Take a handful of soil from about 3 inches deep, which is the planting zone for most transplants. Squeeze it firmly. If water streams out, it’s too wet. If it won’t hold any shape at all, it’s too dry. Perfect transplanting soil forms a loose ball that crumbles when poked but leaves your hand slightly damp.
Timing matters, too. Avoid transplanting right after heavy rain or irrigation. Wait until excess water has drained, usually about 24 hours. For container plants, check that the root ball isn’t waterlogged before planting. Gently knock apart any circling roots to encourage them to grow outward into the surrounding soil.
13. The Support Stake Timing Blunder

Stakes should go in the ground at planting time. When supports are added late, plants have already begun developing their natural support structure. By then, even gentle staking can cause micro-tears in stems that create entry points for disease.
The right technique makes a difference. Place stakes on the dominant wind side, about 2-3 inches from the stem. For tomatoes, install stakes before roots develop to avoid damaging them later. Use soft ties like strips of old t-shirts or special plant tape, forming a loose loop that allows for growth. Check ties weekly and adjust as needed.
Vining plants like peas and beans benefit from having their supports ready at planting. They’ll naturally climb as they grow rather than sprawling and potentially breaking under their weight. For heavy producers like peppers and eggplants, early staking stops branches from snapping when loaded with fruit.
14. Overlooking Soil Temperature

Air temperatures can be tricky in early spring. While days may feel warm, the soil often remains chilly well into the season. Most warm-season plants won’t grow properly until the soil reaches at least 60°F at root depth. Planting too early into cold ground leads to stalled growth, nutrient deficiencies, and increased disease susceptibility.
A simple soil thermometer removes the guesswork. Take readings at 10 AM, measuring the depth at which you’ll be planting. For seeds, check at planting depth; for transplants, measure at 4-6 inches. Some plants have specific preferences for example, tomatoes want at least 60°F, while cucumbers and melons prefer 70°F.
Cold soil solutions include raised beds (which warm faster), black plastic mulch, or cloches. Avoid working in cold, wet soil, as this damages the structure. If you must plant early, choose cold-tolerant varieties and be prepared to protect plants if temperatures drop unexpectedly.
15. Mistaking “Hardening Off” for Sun Exposure
Hardening off seedlings isn’t just about stopping sunscald; it’s about preparing plants for all outdoor conditions. Wind, temperature oscillations, and even changes in humidity all stress plants that have been sheltered indoors. Proper hardening builds stronger cell walls and increases wax production on leaves, reducing water loss.
Begin the process 7-10 days before transplanting. Begin with just a few hours in dappled shade on a calm day. Slowly increase exposure to sunlight and breeze over the week. Pay attention to weather forecasts, as a sudden cold snap or storm can undo all your progress.
Nighttime hardening is equally important. If possible, leave plants outside overnight during the last few days, provided temperatures stay above 45°F. This helps them adjust to the daily temperature swings they’ll face in the garden. Well-hardened plants may look slightly tougher and darker green than their indoor companions, meaning they’re ready for garden life.