
Spring is here, and your roses are waking up. But are they ready to thrive? If you’ve ever felt the frustration of seeing your roses struggle after winter, you’re not alone. Many gardeners face the same challenge: untidy plants, weak blooms, or even pests taking over. But the good news is that with the right care, your roses can bounce back more notably and be more vibrant than ever.
Let’s make your roses the best yet this season. Our proficient gardener shares simple, actionable steps to set your roses up for success. From pruning at the right time to feeding them the nutrients they crave, these tips are designed to help even the most hesitant gardener feel confident.
Imagine walking into your garden and being greeted by lush, healthy roses bursting with color. It’s not just a dream; it’s entirely possible. Ready to Explore Early Spring Care Tips For Roses? Let’s get started!
16 Pro Early Spring Care Tips For Roses — According To Professional Gardeners

1. The Importance of Soil Temperature Testing Before Pruning

Pruning roses too early can do more harm than good. Soil temperature plays a crucial role in determining the right time to start. When the ground is still cold, roses remain dormant, and pruning can shock the plant, delaying growth.
Research from the University of California Cooperative Extension suggests waiting until soil temperatures consistently reach around 50°F (10°C) before pruning. This assures the plant is actively growing and can heal faster.
Testing soil temperature is simple. Use a soil thermometer, available at most garden centers, and measure at a depth of 4-6 inches. If it’s too cold, hold off on pruning. Patience pays off. Roses pruned at the right time produce stronger stems and more blooms. Skipping this step risks stunting growth or exposing tender new shoots to late frosts. Trust the science, and your roses will thank you.
2. How to Identify and Treat Overwintering Pests

Winter doesn’t mean pests disappear. Many, like aphids and spider mites, hide in rose canes or soil, waiting for spring to strike. Early detection is key. Inspect your roses closely for signs like discolored leaves, webbing, or tiny eggs. A study by the Royal Horticultural Society found that overwintering pests can reduce rose vigor by up to 30% if left untreated.
Start by gently cleaning around the base of your roses. Remove fallen leaves and debris where pests often hide. For visible pests, use a mild insecticidal soap or neem oil, which is effective and eco-friendly. Introducing beneficial insects like ladybugs can also help control aphid populations naturally. Regular monitoring and early action can save your roses from significant damage.
3. The Right Way to Remove Winter Mulch Without Damaging New Shoots

Winter mulch protects roses from freezing temperatures, but leaving it on too long can smother new growth. Timing matters. As temperatures rise, gradually remove the mulch to allow the soil to warm up. A contemplation from Cornell University suggests removing mulch in layers over a week to avoid shocking the plant.
Be gentle. Use your hands or a soft rake to carefully lift the mulch, checking for tender new shoots underneath. If you spot any, work around them to avoid breakage. Leaving a thin layer of mulch can help retain moisture while still letting the plant breathe. This balanced approach ensures your roses transition smoothly into the growing season.
4. Why Early Spring is the Best Time to Adjust Soil pH for Roses

Roses blossom in slightly acidic soil with a pH between 6.0 and 6.5. Early spring is the ideal time to test and adjust soil pH because the plant’s nutrient uptake is just beginning. According to research from Texas A&M University, improper pH levels can lock away essential nutrients, leading to poor growth and fewer blooms.
Use a soil test kit to check pH levels. If the soil is too alkaline, add elemental sulfur or composted oak leaves to lower it. For overly acidic soil, incorporate lime. Adjusting the pH early ensures your roses can access nutrients like nitrogen and phosphorus when they need them most. This simple step sets the stage for a season of healthy, vibrant roses.
5. The Secret to Reviving Frost-Damaged Roses

Frost damage can leave roses looking lifeless, but they’re often more resilient than they appear. The key is patience and proper care. Wait until new growth emerges before pruning away damaged parts. Cutting too soon can remove healthy tissue that’s still capable of recovery.
Once new shoots appear, trim back dead or blackened stems to just above a healthy bud. Apply a balanced fertilizer to encourage regrowth and ensure consistent watering. Mulching around the base can also help regulate soil temperature and moisture. With time and care, your roses can bounce back stronger than ever.
6. How to Use Compost Tea for a Spring Nutrient Boost
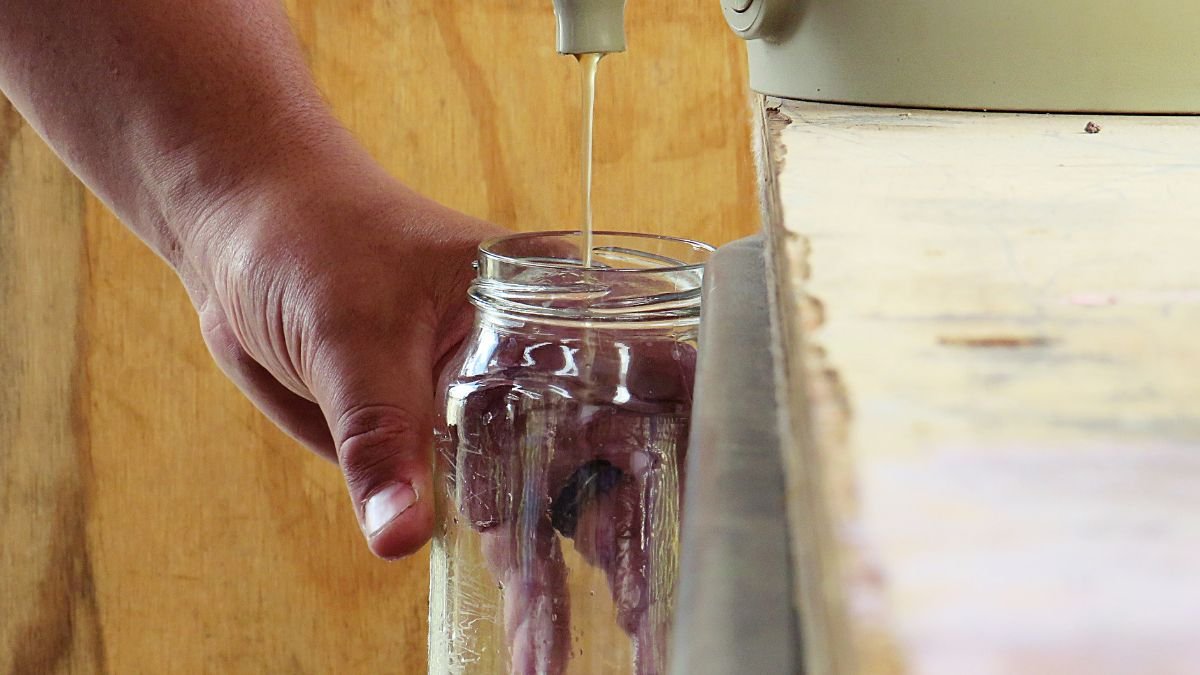
Compost tea is a natural, nutrient-rich elixir that can work wonders for your roses. Made by steeping well-aged compost in water, it’s packed with beneficial microbes and organic matter. To make it, fill a bucket with water, add a mesh bag of compost, and let it steep for 24-48 hours. Strain the liquid and apply it to the soil or as a foliar spray.
Early spring is the best time to use compost tea, as roses are waking up and need a nutrient kickstart. Apply it every two weeks to avoid overloading the soil. The microbes in the tea help break down organic matter, making nutrients more accessible to your plants. This simple, cost-effective solution can lead to healthier roots, stronger stems, and more vibrant blooms.
7. The Art of Selective Pruning

Pruning roses isn’t just about cutting back; it’s about shaping the plant for better health and beauty. Selective pruning focuses on removing dead, damaged, or crossing branches to improve airflow and sunlight penetration. A study by the University of Minnesota found that proper pruning reduces the risk of fungal diseases and encourages more blooms.
Start by removing any dead or diseased wood. Then, thin out crowded areas, especially in the center of the plant. Always cut at a 45-degree angle just above an outward-facing bud to direct growth away from the center. Avoid over-pruning, as this can stress the plant and reduce flowering. A well-pruned rose not only looks better but also grows stronger and healthier.
8. Early Spring Fertilizer

Fertilizing roses in early spring is crucial for a season full of stunning blooms. According to the University of California, roses thrive on a balanced fertilizer with equal parts nitrogen, phosphorus, and potassium. Apply it as soon as new growth appears, typically when soil temperatures reach 50°F (10°C).
Organic options like fish emulsion or bone meal are excellent choices. They release nutrients slowly, reducing the risk of over-fertilization. Avoid high-nitrogen fertilizers, as they can promote leafy growth at the expense of flowers. A well-timed, balanced feed ensures your roses have the energy they need to produce abundant, vibrant blooms.
9. The Role of Mycorrhizal Fungi in Rose Root Health

Mycorrhizal fungi form a symbiotic relationship with rose roots, enhancing nutrient and water absorption. Studies from the University of Washington show that roses with mycorrhizal associations grow stronger and are more disease-resistant. These fungi extend the root system, allowing roses to access nutrients beyond their reach.
Incorporate mycorrhizal inoculants into the soil when planting or during early spring. Simply sprinkle the granules around the base of your roses and water thoroughly. Over time, this natural partnership improves soil structure and boosts plant health. It’s a simple yet effective way to give your roses a competitive edge.
10. Preventing Black Spot and Powdery Mildew Before They Start

Fungal diseases like black spots and powdery mildew can ruin your roses if left unchecked. Early prevention is critical. Research from Cornell University recommends starting treatments before symptoms appear, as these diseases spread quickly in humid conditions.
Keep foliage dry by watering at the base of the plant, not overhead. Prune to improve airflow and remove any infected leaves immediately. Organic fungicides like sulfur or baking soda solutions can be applied preventatively. Regularly cleaning up fallen leaves and debris also reduces the risk of spores overwintering. A proactive approach keeps your roses healthy and beautiful all season long.
11. The Importance of Cleaning and Sharpening Tools Before Spring Pruning

Clean, sharp tools are essential for effective rose pruning. Dirty or dull blades can spread disease and cause ragged cuts that take longer to heal. Research from the Royal Horticultural Society emphasizes that sanitizing tools with a solution of 70% alcohol reduces the risk of transmitting pathogens like black spots and powdery mildew.
Sharpening blades ensures clean cuts, which promote faster healing and healthier growth. Before pruning, inspect your tools for rust or damage. A few minutes spent maintaining your equipment can make a significant difference in the health of your roses. Proper tool care also extends their lifespan, saving you time and money in the long run.
12. The Role of Epsom Salt in Early Spring Rose Care
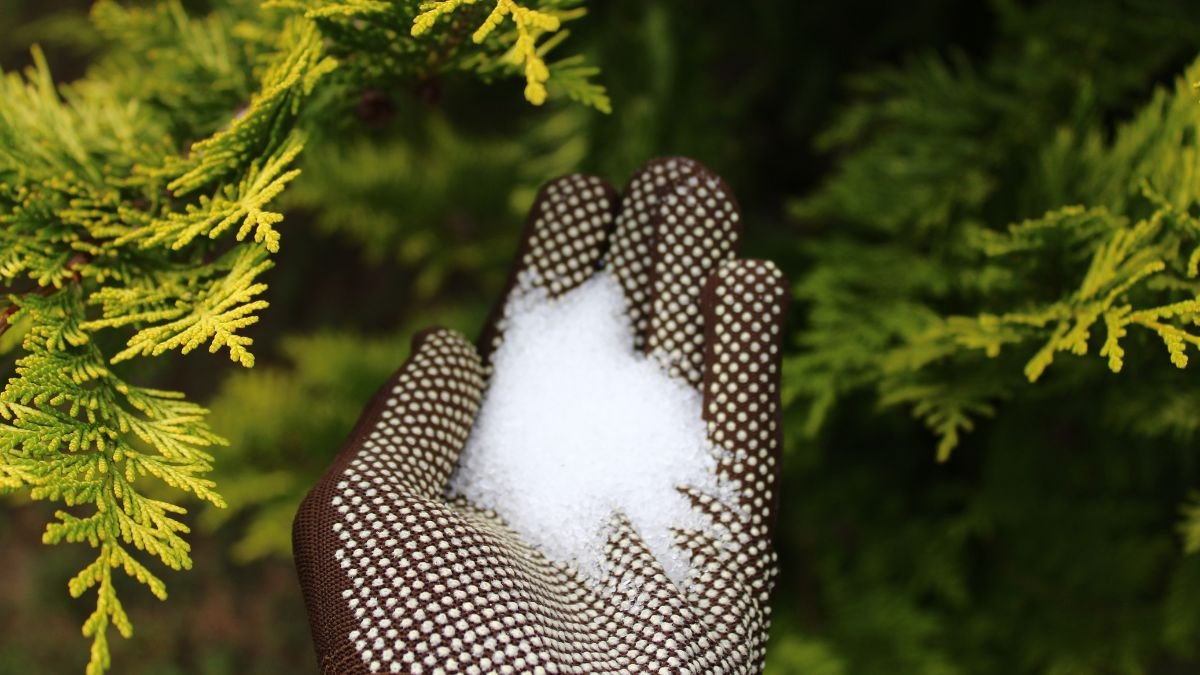
Epsom salt, a natural compound of magnesium and sulfate, can play a significant role in early spring rose care. Magnesium is essential for chlorophyll production, which helps roses maintain vibrant green leaves and strong stems. Sulfate, on the other hand, aids in nutrient absorption, ensuring roses get the most out of the soil.
A study by the National Gardening Association found that roses treated with Epsom salt showed improved bloom production and overall plant vigor compared to untreated plants.
To use Epsom salt effectively, mix one tablespoon with a gallon of water and apply it to the base of the rose bush. This can be done once in early spring and again after the first bloom. Avoid overuse, as excessive magnesium can disrupt soil balance. For best results, combine this treatment with regular watering and mulching. Epsom salt is not a substitute for balanced fertilizer, but it works well as a supplement to promote healthy growth and vibrant blooms.
13. How to Use Dormant Oil Sprays to Control Scale Insects
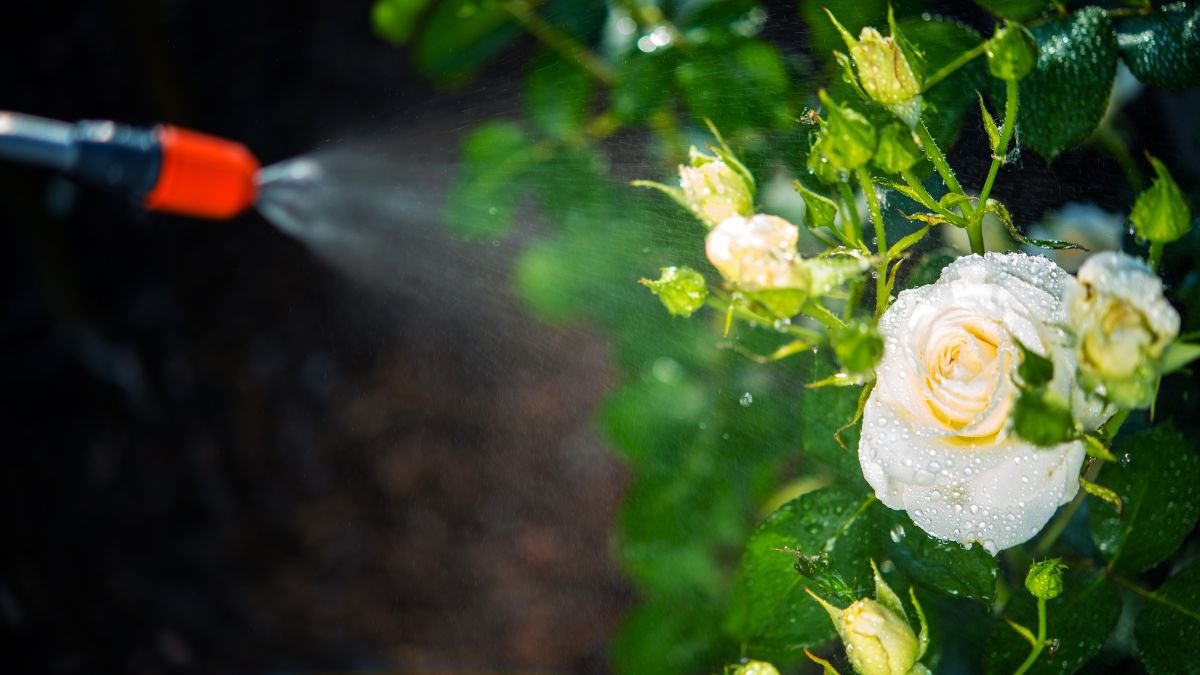
Scale insects can be a persistent problem for roses, especially in early spring when they emerge from dormancy. Dormant oil sprays, made from refined petroleum or plant-based oils, are an effective and eco-friendly solution. These sprays suffocate overwintering insects and their eggs, preventing infestations before they start.
Research from the University of California Cooperative Extension highlights that dormant oils can reduce scale populations by up to 90% when applied correctly.
Apply dormant oil sprays in late winter or early spring, before new growth appears. Mix the oil according to package instructions and spray thoroughly, covering all stems and branches. Avoid application during freezing temperatures or when rain is expected within 24 hours. Repeat the process if necessary, but always follow the recommended intervals to prevent damage to the plant. This method is safe for beneficial insects and helps maintain a healthy rose garden.
14. The Importance of Staking Roses Early for Optimal Growth

Staking roses early in the season is crucial for supporting their growth and preventing damage. Tall or climbing varieties, in particular, benefit from sturdy stakes that keep them upright during wind or heavy rain.
A study published in the Journal of Horticultural Science found that staked roses developed stronger root systems and produced more blooms compared to unstaked plants.
Choose stakes made of durable materials like bamboo or metal, and place them in the ground at planting time to avoid disturbing the roots later. Secure the stems to the stakes using soft ties, allowing room for growth while providing support. Regularly check the ties to ensure they don’t cut into the stems as the plant grows. Early staking not only improves the plant’s structure but also enhances air circulation, reducing the risk of fungal diseases.
15. How to Create a DIY Rose Health Journal for Tracking Progress
Keeping a rose health journal is a practical way to monitor your garden’s progress and address issues promptly. Start by recording key details such as planting dates, varieties, and initial soil conditions. Track watering schedules, fertilizer applications, and any pest or disease treatments. A study from Cornell University suggests that gardeners who maintain detailed records are more successful in diagnosing and resolving plant health issues.
Use a simple notebook or a digital app to log observations weekly. Include photos to document changes in growth, blooms, and any signs of stress. Note weather patterns and their impact on your roses. Over time, this journal becomes a valuable resource, helping you identify trends and refine your care routine. It’s a simple yet effective tool for ensuring your roses thrive year after year.
16. The Benefits of Early Spring Deadheading for Repeat-Blooming Roses
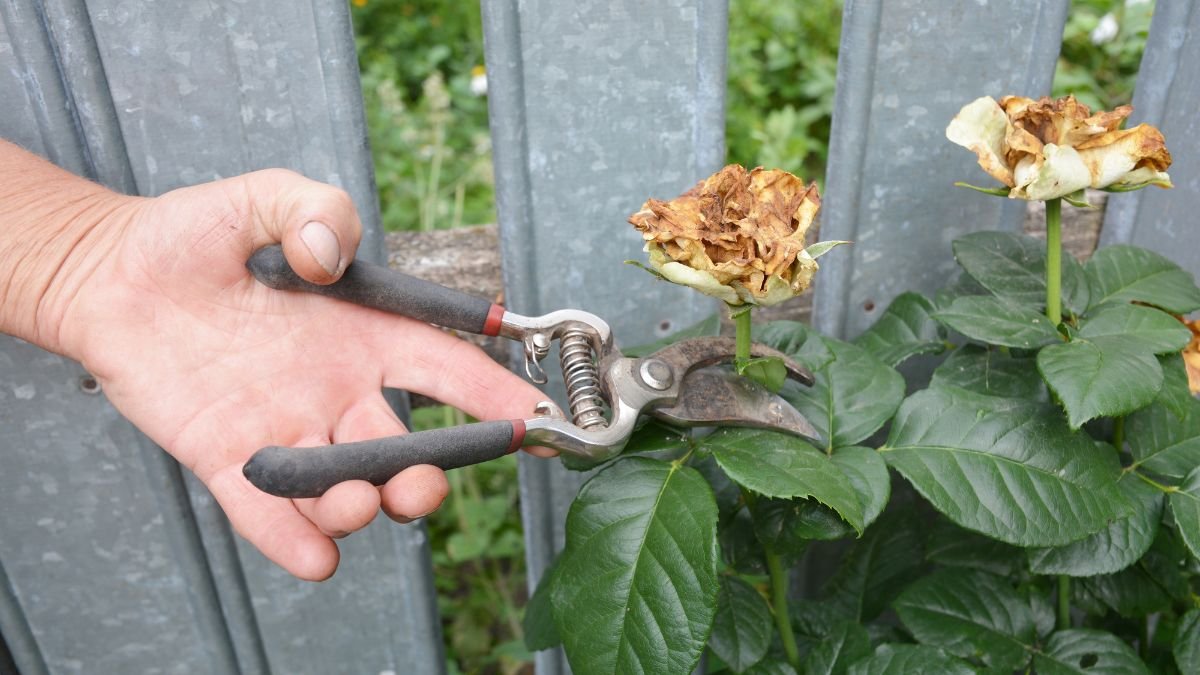
Deadheading, the process of removing spent blooms, is especially beneficial for repeat-blooming roses in early spring. This practice encourages the plant to redirect energy from seed production to new growth and blooms. According to research by the American Rose Society, roses that are regularly deadheaded produce up to 30% more flowers throughout the season.
To deadhead effectively, use clean, sharp pruners to cut just above a set of healthy leaves or a five-leaflet stem. This promotes outward growth and prevents the plant from becoming leggy. Early spring deadheading also helps maintain the plant’s shape and reduces the risk of disease by removing decaying material. Make it a habit to inspect your roses weekly and remove any faded blooms promptly. This simple task can significantly enhance the beauty and productivity of your rose garden.