
It’s the one sound every camper dreads: the slow, steady drip… drip… drip of water inside their tent at 3 AM. Waking up cold and damp with a wet sleeping bag is more than just uncomfortable; it can ruin a trip.
This misery is usually caused by one of three culprits: rain getting through the fabric, moisture seeping up from the ground, or the sneaky one condensation from your own breath.
You will learn about the key gear categories that create a “dry tent system” and exactly how to use them for camping in 2025. These are the real wet tent solutions that work, so you can finally keep your tent dry and sleep soundly through the night.
Why Tents Get Wet: A Quick Guide to Moisture
To solve the wet tent problem, you first need to understand where the water comes from. Moisture can attack from three different fronts.
- Penetrating Rain: This is the most obvious enemy. Over time, the waterproof coating on your tent’s fabric wears down. Seams stretch and their factory taping can peel, creating tiny pathways for water. Even zippers can be a weak point in heavy, wind-driven rain.
- Wicking Ground Moisture: The ground might look dry, but it often holds a surprising amount of water. When you lie down, your body weight puts pressure on the tent floor. This pressure can force moisture from the damp ground directly through the fabric, making the inside of your tent feel clammy.
- The Culprit Condensation: You wake up, the inside walls of your tent are wet, but it didn’t rain. What happened? That’s condensation. One person can exhale up to a liter of water vapor overnight while sleeping. This warm, moist air rises, hits the cool surface of your tent fabric, and turns back into liquid water.
The 3 Culprits of a Wet Tent
Even the best tents can get damp. Understanding the cause is the first step to staying dry. Here’s how moisture sneaks in.
Penetrating Rain
Seams are the Weakest Link
Over time, waterproof coatings degrade and factory seam tape can peel. This creates tiny pathways for wind-driven rain to seep through the fabric.
Wicking Ground Moisture
Pressure Forces Water Up
The ground holds significant moisture. Your body weight on the tent floor creates pressure that can force this hidden dampness directly through the fabric.
Condensation
~1 Liter of Vapor Per Night
One person can exhale up to a liter of water vapor while sleeping. This warm, moist air hits the cool tent fabric and turns back into liquid water droplets.
Choosing the Best Tent Footprint
Your first line of defense isn’t part of the tent itself it’s what goes underneath it. A tent footprint, or groundsheet, is a crucial piece of gear that solves two problems at once. First, it’s an essential moisture barrier that stops water from the ground from being pushed through your tent floor. Second, it protects the floor from rocks, roots, and sticks that could puncture or scrape it, which helps your tent last much longer.
Sizing is everything. Here is the golden rule: your footprint must be slightly smaller than your tent floor. If it sticks out, it will catch rainwater and channel it directly under you. This creates a puddle right where you sleep, making the problem worse. Always tuck the edges of your footprint so they are completely covered by the tent.
Modern footprints come in a few different materials. Heavy-duty PE (Polyethylene) tarps are cheap and durable but also bulky and heavy. Most manufacturer footprints are made from Silpoly or Silnylon, which match the tent material and are very lightweight. For backpackers looking for the best tent footprint that is also light, a DIY option is often best.
Here’s a quick comparison for a popular 2-person tent:
| Manufacturer’s | $170-$220 | $40 – $60 | Perfect fit, easy setup | Expensive |
| DIY Tyvek | $140-$190 | $10 – $20 | Durable, cheap, light | Noisy, requires cutting |
| DIY Polycryo | $30-$50 | $5 – $10 | Extremely lightweight | Less durable, can rip |
How to Waterproof a Tent Like a Pro (Seams & Fabric)

Now that your foundation is secure, let’s look at your tent’s main armor: its fabric and seams. A few simple maintenance steps can turn a leaky tent into a fortress against rain.
Step 1: Inspect Your Tent Thoroughly in Daylight
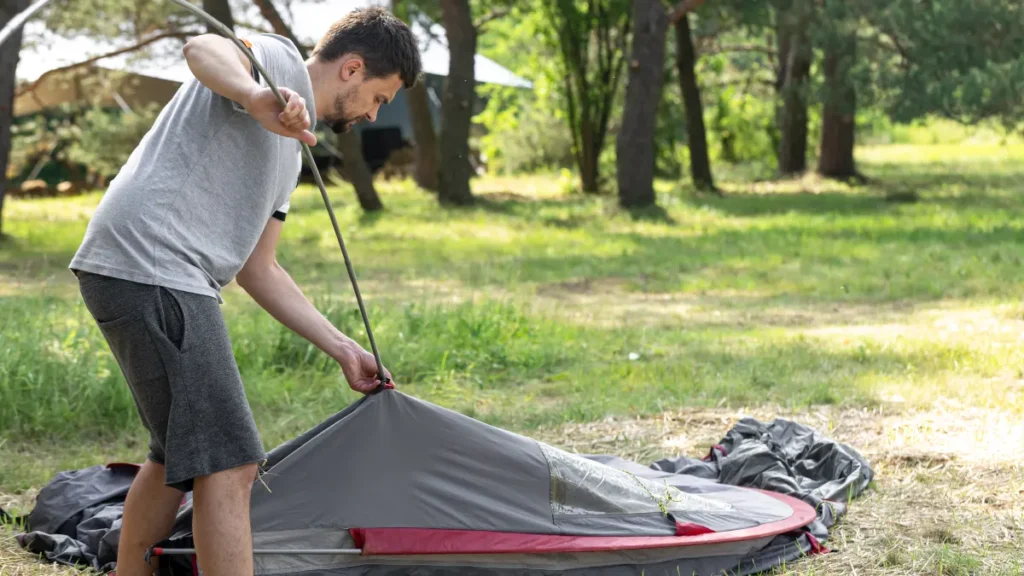
Before you can fix any problems, you have to find them. Do this at least a week before your trip, not the night before you leave.
- Set it up completely: Pitch your tent, including the rainfly and all guy lines, in your backyard or a local park. Don’t just lay it out on the floor. You need the fabric to be tight to see the weak spots.
- Look for holes and wear: Get inside the tent and close the door. Look up at the fabric against the bright sky. Any pinprick holes in the rainfly or tent body will be immediately obvious. Pay close attention to the tent floor, checking for any scrapes or worn-out areas from previous trips.
- Check the seams: Run your fingers along all the seams on the inside of the rainfly. You are feeling for any tape that is peeling, cracking, or flaking off. These are guaranteed leak points in the rain. Check the corners and the ridgeline seam with extra care, as these are high-stress areas.
Tent Inspection: Step 1
Dive into preparation! A clear view of your tent’s condition prevents surprises.
Pitch Your Tent
Check for Holes
Examine Seams
Step 2: Give Your Tent a Proper Wash
You cannot apply new waterproof treatments to a dirty tent. Dirt grinds into the fabric, wears down the coatings, and prevents new treatments from sticking.
- Use the right soap: Get a specialized gear cleaner like Nikwax Tech Wash or just use a very mild, non-detergent soap. Never use household detergents, dish soap, or bleach, as they will strip the factory waterproof coatings off your tent.
- Wash by hand: Fill a large tub with cool or lukewarm water. Use a soft sponge or microfiber cloth to gently clean the rainfly and tent floor. Focus on any spots with dirt, sand, or tree sap.
- Rinse and dry completely: Rinse the tent thoroughly with clean water to remove all soap residue. Hang it up to air dry in a shady spot, as direct UV sunlight can degrade the fabric over time. Make sure it is 100% dry before moving to the next step or storing it.
Step 2: A Fresh Start for Your Tent
You can’t apply new waterproofing to a dirty tent. A proper wash ensures new treatments will bond correctly to the fabric.
Choose Your Cleaner
Use a specialized gear cleaner or a mild, non-detergent soap. Never use household detergents, dish soap, or bleach, as they will strip the original waterproof coatings.
Gentle Hand Wash
In a tub of cool or lukewarm water, gently clean the rainfly and tent floor. Use a soft sponge, focusing on areas with dirt, sand, or tree sap. Avoid abrasive scrubbing.
Rinse & Air Dry
Rinse thoroughly to remove all soap residue. Hang the tent to air dry completely in a shady spot, as direct UV sunlight can degrade the fabric over time.
Step 3: Re-Waterproof the Seams and Fabric
This step restores your tent’s primary defenses against rain. It’s a two-part process that targets the most common failure points.
- Part A: Seal the Seams: With your clean rainfly set up inside-out, apply a thin bead of seam sealer to all the seams you identified in Step 1 (or all of them, for peace of mind). Use a product like Gear Aid Seam Grip and the small brush to spread it into an even layer over the stitching. Let it cure for a full 24 hours until it’s no longer tacky.
- Part B: Reapply the DWR Coating: Set the rainfly up normally (right-side out). Test the existing coating by spraying it with water. If the water beads up and rolls off, you’re good. If it soaks in and darkens the fabric, you need to reapply. Spray the entire outer surface evenly with a DWR spray (like Granger’s Performance Repel Plus). After a couple of minutes, use a damp cloth to wipe away any excess drips. Let it air dry completely.
Step 3: Re-Waterproof & Shine!
Restore your tent’s primary defenses against the elements, ensuring it’s ready for any adventure under the stars.
Part A: Seal the Seams
This is crucial for preventing leaks where the fabric pieces are stitched together.
- Apply a thin bead of seam sealer.
- Spread it evenly with a brush.
- Allow 24 hours to cure completely.
Part B: Reapply DWR Coating
Restore the fabric’s ability to shed water, keeping your tent light and dry.
- Test coating; reapply if water soaks in.
- Spray DWR evenly on the outer surface.
- Wipe excess drips, then air dry completely.
Step 4: Test and Fit Your Footprint Correctly
A footprint that is the wrong size will make your wet tent problem worse, not better.
- Lay it all out: Place your footprint on the ground where you plan to pitch your tent.
- Pitch the tent on top: Set up your tent completely, directly on top of the footprint.
- Check the edges: Walk around the entire perimeter of your tent. The footprint should be completely hidden underneath. If you can see any part of the footprint sticking out from under the rainfly, it is too big.
- Adjust if needed: If the footprint is too large, fold the edges under or, for a permanent fix, trim it so it is about one to two inches smaller than the tent floor on every side.
Step 4: Footprint Fun!
Don’t let a bad footprint ruin your camping trip! Get it just right to keep your tent dry and happy.
Lay It All Out
Spread your footprint on the ground where your tent will go, ready for the adventure.
Pitch Tent on Top
Set up your tent directly over the footprint, making sure everything aligns perfectly.
Check the Edges
Uh oh! If the footprint peeks out, it’s too big and will collect water!
Adjust if Needed
Easy fix! Fold or trim the edges so the footprint is hidden.
The Final Piece: Gear and Tactics for Tent Condensation Solutions

You’ve sealed out the rain and blocked ground moisture, but you can still wake up damp. It’s time to win the air war against condensation.
Ventilation is non-negotiable. The goal is to get the moist air from your breath out of the tent while letting drier air in. Most tents have a “high-low” ventilation system. Open the lower vents (often on the sides or doors) to let cool, dry air in, and open the upper vents to let warm, wet air out. Use your guy lines to stake the rainfly out as far as possible from the tent body. Pro Tip: Staking out the sides of your rainfly just 6 extra inches can increase airflow by over $30, which is a huge help to reduce tent condensation.
Finally, your strategy matters. Try to set up camp under trees, which can reduce the amount of dew that forms on your tent. Avoid pitching in damp, grassy depressions near lakes or streams where humid air settles. If you do wake up with wet inner walls, the “morning wipe-down” is your best friend. Use a small, super-absorbent microfiber towel to wipe away the moisture before it has a chance to drip on your gear. This simple trick is one of the most effective tent condensation solutions.
The Final Battle: Win the Air War
You’ve sealed out rain and blocked ground moisture. Now it’s time to defeat the final enemy: condensation from the inside.
Master High-Low Airflow
Open low vents to let cool, dry air in, and high vents to let the warm, moist air from your breath out. Create a constant cycle.
Choose Your Battlefield
Camp under trees to reduce dew formation. Avoid pitching in damp, grassy depressions near water where humid air settles.
The Morning Wipe-Down
Use a small, super-absorbent microfiber towel to wipe away moisture before it drips. One of the most effective tricks!